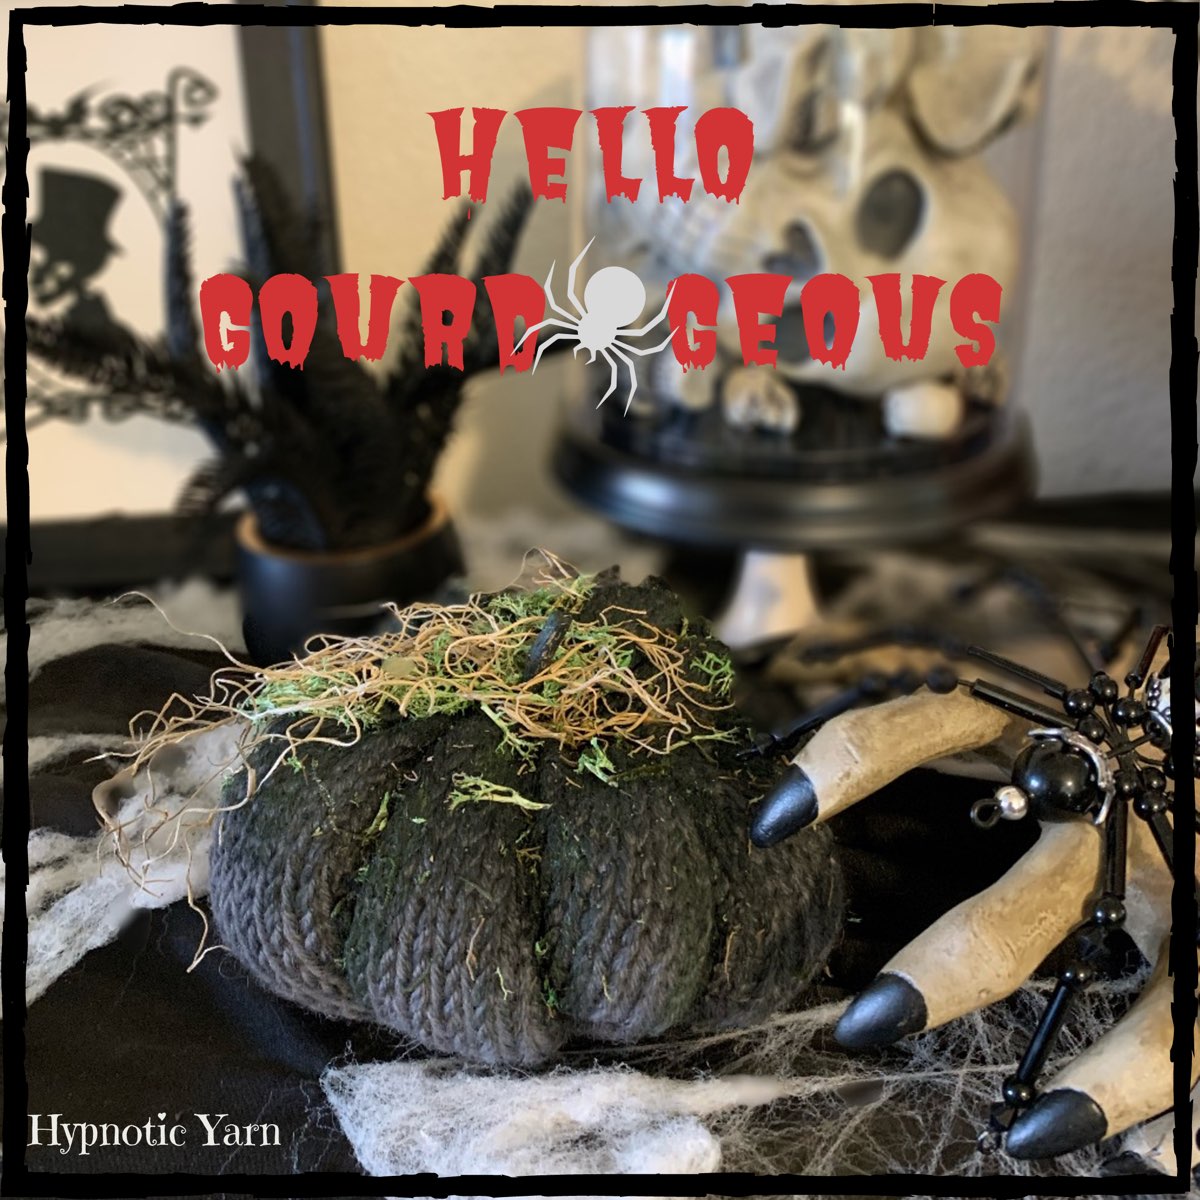
Hello Gourd-Geous! A free knitted pumpkin pattern

Pumpkins are perfect fall decor in and out of the home. But in my house, you won't find any pumpkin spice or all things nice. I go dark and scary all season. 💀
For this blog, I will show you how to paint your knitted pumpkin to look AND smell rotted and musky.
Step 1: Get Hello Gourd-Geous pumpkin pattern emailed to you.
Step 2: Knit your Pumpkin. I used a dark grey sport weight yarn held double. If you don't have grey yarn, black, moss green, brown, or a deep pumpkin orange would all make a beautiful, rotted pumpkin.

Step 3: Gather Materials
- Your finished pumpkin
- a pumpkin stem: I used a small twig. Though I love the idea of twirling a small piece of thick wire around a pencil.
- Spanish Moss and Reindeer Moss: I found both of these in a small package at my local $ store.
- Paint: your paint colors will depending on what color yarn you used. If you used a non-black color, you'll need black or dark grey and green paints. If you make a black pumpkin you'll probably want a light grey and lighter green paints.
- Fabric medium: this is essential. You'll mix a very small amount with your paint. This will help the paint stick to the yarn without becoming hard and crumbly.
- Paint brushes. I used a medium sized tipped brush plus a fan brush.
- Used charcoal or campfire ashes. this is what gives it a smoky death smell. I took blackened log pieces out of our meat smoker.

**Steps 4-6 should be completed somewhat quickly because you don't want the paint drying on you while trying to blend colors.
Step 4: Add your stem before painting. Mix a few drops of fabric medium with each paint color on your palette. Starting with your darkest color, brush the paint on the top of the pumpkin as well as down each crease. It will look rough right now-that's ok! We'll blend it all in. Photo A below.
Step 5: Brush on the green, you can mix in a small amount of black if you'd to darken the color. Focus on the top and sides of the pumpkin. I added green about half way down the pumpkin wedges. Avoid adding green to the creases we want those to stay shadowed. Photo B

Step 6: Using a fan brush, blend the colors together, taking the paint down the sides. Paint your stem if desired. Add colors to create depth. Keep in mind you want the very center of your pumpkin dark (by the stem) as well was the creases. You can use lighter colors on the wedges. Photo C
Step 7: When you're happy with your colors, let it sit and dry. It will take 3-4 hours. Photo D
Step 9: If desired, add a bit of water to your charcoal and grind it all together. Brush it on top of your pumpkin. This will give it a smokey, earthy smell. Let it dry again.
Step 8: When the pumpkin is completely dry, add the mosses. I rolled my pumpkin in the moss crumbs first then topped with a smidgen of both mosses.
Step 9: Add a spider or two and set out with your spooky decor!

Hope you enjoyed this tutorial!
-Brianne


Comments